I mostly blog about art and art supplies. Today is something a little different, so if you’re here for my rambles about watercolour pigments, come back next week 🙂 If you’d like a tour of my pretty DIY kitchen, keep reading.
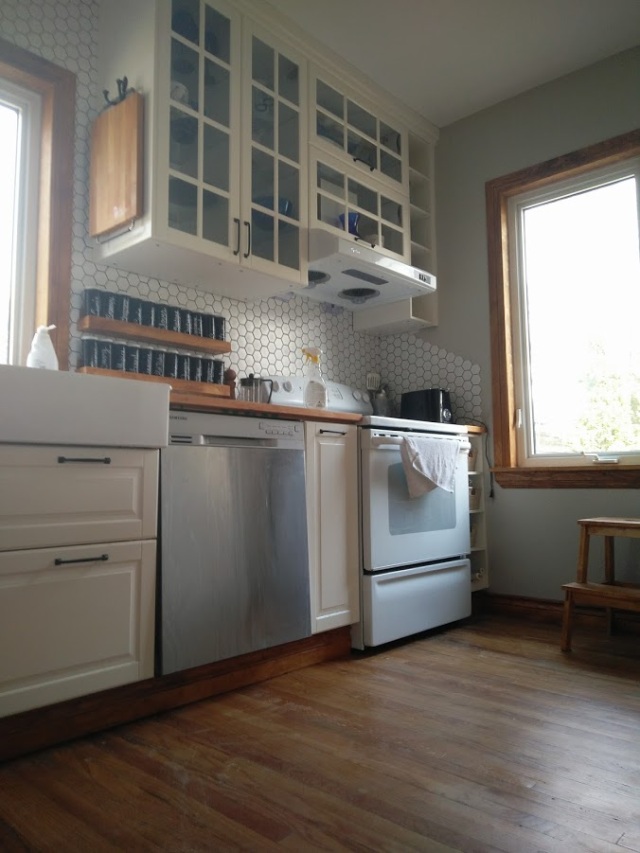
On April 15th, 2016, Jordan and I got the keys to our first home. It was perfect, except for the kitchen (and also except for all the floors, and the ugly wallpaper, and all the plumbing and electrical, and *that* washroom, and the structural heating vent…little stuff). Let’s talk about the kitchen. Here’s what the kitchen looked like the day we put in our offer:

Apart from a pantry cabinet squished into the corner behind a window, a spice cabinet in the side hall, and a faux-brick wall facing the dining room, that’s the whole kitchen. Zero counter space. No dishwasher. Barely any storage. Ceilings mysteriously 6 inches lower than surrounding rooms. Aesthetically is wasn’t terrible, but functionally, this was significantly worse than the kitchen in the cheap rental we were living in.
We kept our apartment for 3.5 months after getting our house keys, so that we could DIY gut renovate the kitchen before moving in. The moment we got our keys, we came in with a sledgehammer and crowbar and started demolition. Every day after work we came in and did some work on the kitchen so that it would be done by move-in day. We ….(mostly) succeeded.
By the time we moved in, our new kitchen had new walls and cabinets and counters, a working sink, dishwasher and other appliances. I’ve been happily enjoying my lovely new kitchen for the past 8+ months. However, I didn’t want to share a before and after because …we had construction lights instead of real fixtures for weeks. Drawer hardware took months. We finally put up our backsplash tile and grouted last month. And we finally, FINALLY tackled our trim in the past couple weeks.
Now, a year later, I’d love to share what our kitchen is looking like, and some fun before/during/after shots. First, here’s the tour, as our kitchen looks today


Next, take a look through some before/during/after pics. I’ve tried to get similar lighting and angles. However, although the kitchen stayed more or less in the same footprints, the different window and door positions, as well as changes in available light, made keeping consistent angles throughout a bit tricky.


We swapped two windows, removed a section of (non-structural) wall and moved the doorway into the dining room into a new spot in our centreline wall, where the weird hallway pantry used to be.


The moment we got our keys, we came in with a sledgehammer and crowbar and started demolition. We did the demolition, structural framing, cabinet installation, floor, tiling and trim ourselves. We hired contractors for plumbing, electrical, HVAC, sprayfoam insulation and drywall.


When we first saw the house we fell in love with the wood trim. Originally stained a dark colour when the house was built in the 1920s, then painted white, the previous owners had stripped most of it down to a rich orangey brown patina. We wanted the kitchen to fit in with the character of the rest of the house, but feel light and airy and have modern conveniences.


We rescued as much of the original trim as we could. We used similarly coloured beech butcherblock counters and stained pine millwork, and refinished the original white oak floors we found buried under layers of vinyl and linoleum and 3000 wood cleats


Between excavating the floor and removing the dropped ceiling, we gained 7 inches of ceiling height in the new kitchen, which allowed us to put in 40 inch upper cabinets instead of the standard 30, and also raise them up 4 inches higher on the wall, giving us more visual space at counter level.

Building our kitchen has been a long and difficult journey, but we’re very proud of what we achieved! Next up, finishing up my home studio 🙂